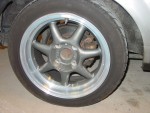
Rear brake rotors and pad replacement
How to by Mux213
We sortof wanted to do a how to on this but heck, we totally forgot to take enough pictures:)
I’ll see how far I can get with what we have:)
Step 1: loosen the bolts while the car is still on the ground, but dont remove them.
Step 2: Jack up the car. For most this will be enough but because Banpei has some special 4links we couldn’t get the caliper off so we put an axle stand underneath the axle and lowered the car a bit.
Step 4: we get the caliper off, we do this by unscrewing the bolt attaching the caliper to the bracket and then swiveling the caliper. Until it is free from the brake disk and only attached at the top. Simply push the caliper back and it comes right off. Put the caliper away so it is out of your way but not hanging by the brake cables! We were able to put ours on the 4links but as mentioned, banpeis 4links are a bit different.
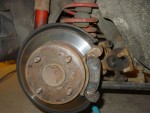
Step 5: take the brake pads out of the brackets, then loosen the two bolts holding the bracket to the axle. The bracket will come off nicely.
Step 6: Take the brake disk off. If it is stuck there are two small holes in the brake disk in to which you can screw a bolt, this bolt will push the disk off. Make sure you put a bolt in both holes and tighten them evenly or the disk will get stuck even more. IF it still doesn’t come loose, a hamer does wonders:)
Step 7: Put the new disk on. For those with a keen eye you will notice we forgot to push the disk in place enough, we eventually had to loosen everything again, put the disk on right, and put everything back on again:) So lesson to be learned, put the new disk brake firmly in place.
Also brake cleaner is very important at this point. The disk brake will be covered in yucky stuff to keep it from rusting, spray on brake cleaner on the brake surface and wipe it off with a clean rag to remove this yucky stuff.
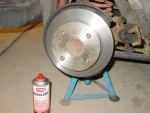
Step 8: Bolt the brackets back on and place the brake pads where they are supposed to go. Make sure the brake pads can move from and too the disk freely or they will get stuck and your braking will not be very good.

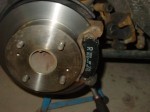
Step 9: Now you have to put the caliper back on but you’ll notice this doesn’t fit at this time. The reason is very simple, every time you brake you wear your pads a tiny bit. As you do the piston in the caliper will come outwards.
With fresh pads the piston is to far outwards to fit, it needs to be pushed back in. With front calipers this is easy, just push them, but with these rear calipers the handbrake mechanism makes this impossible. Instead you need to turn them clockwise to get them to retract.
There are specials tools for this which you can best use. We dont have the special tools so we did it with a gripper. This is a bit dangerous as it can damage the dust cover, and that is something you do not want.
As you can see on the piston there are two indentations. These are used by the special tool but they also grip into two little studs on the brake pads. So you must make sure that one of the indentations points towards the brake pads.
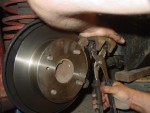
Step 10: push the caliper back into position and fasten the nut that keeps it in place
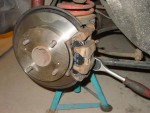
Step 11: Put the wheel back on and take the car of the axle stand and then off the jack.
And we are done:)
